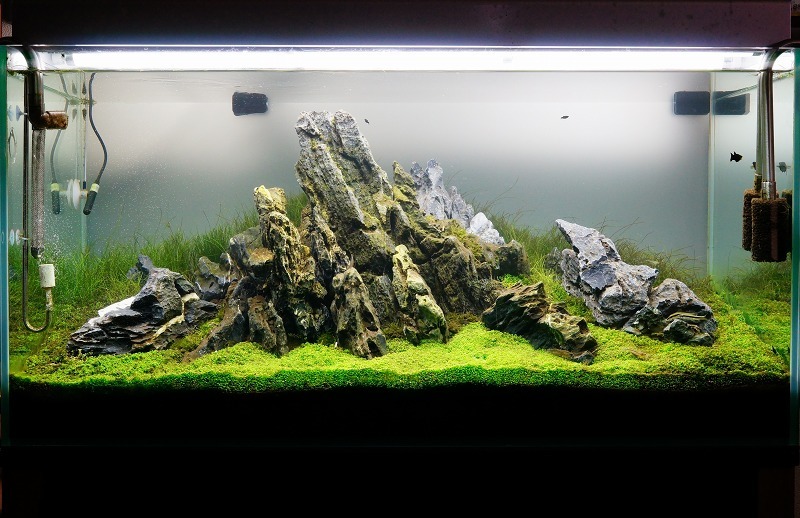
Aquascaping is so much fun when you are a hobbyist and love to experiment with different décor items. Adding different alluring things and at the same time placing them in such a way that they look unique is all which is required in aquascaping. It makes the entire tank look attractive.
There are a number of things which one can use in the tank for creating a wonderful aquascape. Out of so many, aquarium rocks are the most popular one. The reason behind is the presence of diverse types of rocks which are found naturally in the water. If we start numbering, there will be an endless list of rocks which are suitable for the aquarium.
There are two options to get aquarium rocks. The first one is buying them from the store, and the other one is picking them from the natural surroundings. If you are considering the first option, you will get ready to use rocks. However, the second option could go wrong if you don’t have enough information about the aquarium rocks, and how they should be used. At the same time, one wrong rock and it could prove catastrophic to the aquarium.
So, here we are going to provide the information on the safe rocks, how they should be used, and what measures you need to take before introducing them in the water.
How to pick the right aquarium rock?
Rocks can alter the hardness, pH, and many different parameters of the water. Although you could save a good amount of money by getting the rocks from the natural surroundings, one wrong choice could risk the well-being of your fish and plants in the tank. Using a random rock from the backyard is not a safe idea. You might be working hard to maintain the right pH of the water, but as soon as you introduce any random rock without much investigation, it could change everything.
Other than this, one more important criterion is to look out for the growth of bacteria in the rocks. There are many rocks which harbor different bacteria that can flourish in the water and pose a danger to the lives of fish. Therefore, you have to make sure not to collect rocks from the polluted areas like dirty river or pond.
Moreover, instead of getting a brittle rock which can easily crumble inside the aquarium, you need to have a solid rock. Water erosion can disintegrate a brittle rock and pollute the water of the aquarium.
From where to get the aquarium rocks
Although river banks seem the easiest option to get the rocks, they are not recommended at all. In general, the rivers, streams, ponds, etc. are heavily polluted. The rocks from these places harbor not only harmful bacteria but also other microscopic organisms. They may deteriorate the water quality to a great extent and pose a risk to the lives of water creates.
Other than this, it should be important to know that the rocks do not contain any metal. In general, the metals start rusting when coming in contact with water. It is again not healthy for the fish. Therefore, do not rely on rocks from the water bodies and never introduce them directly.
Some points you must keep in mind are-
- No selection of rocks from the river banks, ponds or other water bodies
- No selection of rocks from the polluted areas like the swamp
- Should not introduce any random rock without proper investigation about it
- Should not introduce metallic rocks
What types of rocks are the best for an aquarium?
Although there are a few restrictions while selecting rocks for the aquarium, you can still find a large number of them suitable for your tank. There is a long list of rocks which are perfect for the aquariums and are readily available. The best part is they are easily identifiable as well.
Some safe aquarium rocks are
- Granite
- Quartz
- Lava rock
- Slate
- Petrified wood
Every rock falling into the category of the above list is just perfect for the tank. Some rocks listed above tend to alter the pH and hardness of the water to some extent. However, this change is small enough to neglect. So, you can simply introduce them after proper treatment.
What types of rocks should be avoided?
Apart from considering every above fact while selecting, there is a list of rocks which needs complete avoidance. Among them, carbonate rocks hold the foremost place. Carbonate rocks change the hardness and pH of the water to a great extent. They should be a complete NO is yours is a soft water tank. Still, if you want to introduce, keep an eye on the water parameters regularly and make sure they are within limits to ensure the health of fish and plants.
How to know it’s a carbonate rock?
There could be times when you mistake a carbonate rock with some other rock and introduce it in the tank. To rule out this possibility, just pour some drops of white vinegar in the surface of the rock. If the white vinegar fizzes, it means that it is a carbonate rock. For a more accurate result, you may use hydrochloric acid and test in the same way.
Carbonate rocks are everywhere, from rivers to the backyard. Therefore, you need to be highly cautious before using any one of them in the tank. Some commonly found carbonate rocks are listed below:
- Coral
- Dolomite
- Limestone
- Alabaster
- Crushed seashells
- Marbles
- A few types of sandstones
How to prepare a rock before introducing it inside the aquarium
As mentioned earlier, you cannot just take some stone and put it inside the tank. Proper preparation and treating the rock is essential to maintain the ambiance of the water. The first and obvious thing is cleaning the rock thoroughly with clean water. You can take a stiff brush and scrub off all the attached debris and residues. Make sure you have cleaned all the residues as even a small amount can alter the water parameter.
Once you have clean and scrub off the entire residue, the next step will be to boil the rocks. Sounds little awkward? Well, if you are placing rocks in the aquarium, you have to be double sure of it being free from bacteria and other microorganisms as well. Boiling is one of the best ways to kill most of the harmful bacteria that are residing inside and outside of the rock you have collected.
How to boil the rock
Take a big vessel which is broad and deep enough to submerge rocks under the water. Now pour clean water inside the vessel. Add the rocks and make sure they are properly immersed. Set the stove in medium flame and let the water boil for at least 20 to 30 minutes. You can stir the rocks occasionally and ensure they are getting appropriately boiled.
After half an hour, remove the pot from the flame and take the rocks out form the vessel. Now place a clean paper towel on a dry surface and out the rocks on it one by one at some distance. Allow them to dry properly. Keeping them in an open or airy area will cool them down in around half or one hour. You can simply touch the rock to know whether it is still hot or not and later add to the tank.
Note: It is important to take a few safety measures while boiling the rocks. Occasional stirring is essential, and too much boiling should be avoided. A few instances of rock getting burst while boiling has been reported. However, this is not the case all the time. At the same time, porous rocks should not be set to boil. If you start boiling them, they may crumble and break down.
So, what will do you to cleanse the porous rocks? Well, the answer is bleaching.
Bleaching to clean the rocks
Bleach solutions work wonders to clean the rocks, especially those that can’t be boiled. It removes all the impurities from the rock and makes them suitable for introducing in the tank. Bleaching the porous rocks is the best way to get rid of bacteria and pollutants from them.
First of all, take a large and deep container which can hold all the rocks in a properly immersed condition in the bleach solution. The desired ratio of water and bleach needs to be 10:1. Let the rock soak in the solution for at least 24 hours. After a day, carefully remove the rocks from the solution and rinse them thoroughly in the running water.
You need to make sure that none of the traces of bleach solution is left in the rocks. For this, you will have to soak the rocks in the clean water for a couple of hours.
Placing the treated rocks in the aquarium
Now the final step is putting the rocks in the aquarium. If you think this is going to be the easiest step without any instructions involved, then you might be a little wrong. There are certain points that you need to keep in mind:
- Not piling the stones against the glass because if sometimes they are put under pressure, the glass may break.
- Avoiding stuffing all the rocks in one corner of the tank.
- Putting the rocks slowly and gently so that they do not crack the glass unintentionally.
- Securing the rocks properly
If the design you are looking for requires stuffing the rocks in one corner, then put them in such a way that the glass pane can take the pressure of additional rocks. Otherwise, a uniform placement of the rocks is the best way to decorate the aquarium.
Another important point is securing the rocks with the help of some non-toxic glue like silicon glue. There could be times when a rouge fish knocks down the rock, making it fall off on the aquarium glass and causing it to break. Therefore, to prevent this from happening, apply some silicon glue to the rock and then place it wherever you want in the tank.
So, these are some of the essential points you need to keep in mind while placing aquarium rocks in your aquarium. It will ensure maintaining the proper environment in the tank and at the same time, safety and well being of the fish and plants.

Please fill in the form get updates on new articles.
Thanks, you are incredible